Example Review

Introduction

One of the best ways to get started with CHAI3D is to explore the different examples that come with the framework. As you explore each one of them you will quickly discover that all examples share a very similar structure and code base with minor variations between the examples.

In the following section we explore example 11-effects and comment on some of the important sections of the code. Compiling and modifying existing examples is the best way to familiarize yourself with the different concepts and functionalities of the library.

fig-example-1.png
Example 11-effects: Programming haptic effects on four spheres.

Code Review

Almost every application begins by creating a world in which objects, light sources, cameras, and tools can be inserted. The world acts as the root node of the entire scene graph. A uniform background color can be also assigned, though by default it is set to black. For more advanced background schemes, you can explore the 2D widgets (see class cBackground).

using namespace chai3d;
// create a new world.
world = new cWorld();
// set the background color of the environment to black
world->m_backgroundColor.setBlack();

To graphically render a view of the world inside a window display, we need to define at least one camera that captures the world from a desired location. After creating a camera, we insert it in the world. The camera now becomes a child node of the world.

using namespace chai3d;
// create a camera
camera = new cCamera(world);
// add the camera to the world
world->addChild(camera);
// position and orient the camera
camera->set(cVector3d(3.0, 0.0, 0.0), // camera position (eye)
cVector3d(0.0, 0.0, 0.0), // lookat position (target)
cVector3d(0.0, 0.0, 1.0)); // direction of the (up) vector
// set the near and far clipping planes of the camera
// anything in front/behind these clipping planes will not be rendered
camera->setClippingPlanes(0.01, 10.0);

CHAI3D offers some powerful capabilities to render scenes in stereo mode and on mirrored displays. Different stereo modes exist depending of the type of 3D display you own. If you are using a 3D television display, then setting the display mode to C_STEREO_PASSIVE_TOP_BOTTOM is probably your best option. You may also have to adjust settings on your television or monitor to activate the correct mode. Check the documentation of your TV or monitor to learn more about enabling 3D settings.

using namespace chai3d;
// set stereo mode
camera->setStereoMode(C_STEREO_PASSIVE_TOP_BOTTOM);
// set stereo eye separation and focal length (applies only if stereo is enabled)
camera->setStereoEyeSeparation(0.03);
camera->setStereoFocalLength(3.0);
// set vertical mirrored display mode
camera->setMirrorVertical(mirroredDisplay);

If your scene contains any transparent objects, then enabling multi-pass rendering can greatly improve the overall quality of the output image. This mode renders the scene in multiple passes by drawing all of the opaque objects first, followed by the transparent ones.

// enable multi-pass rendering to handle transparent objects
camera->setUseMultipassTransparency(true);

For the camera to "see" the objects in the scene, at least one light source needs to be added to the world. In this example we create a directional light source. The default light color is white, but can be changed to any value. See the section about lighting for more information.

using namespace chai3d;
// create a light source
light = new cDirectionalLight(world);
// add light to world
world->addChild(light);
// enable light source
light->setEnabled(true);
// define the direction
light->setDir(-1.0, -1.0, -1.0);

Next, we instantiate a haptic device handler which gives us access to all of the haptic devices connected to the computer. In this example, we select the first haptic device available from the list.

using namespace chai3d;
// create a haptic device handler
handler = new cHapticDeviceHandler();
// get access to the first available haptic device found
handler->getDevice(hapticDevice, 0);

In CHAI3D, a tool acts as a visual avatar that represents the haptic device in the world. The simplest tool is a 3D cursor, which is symbolized by a small sphere. After creating the tool, a haptic device is attached to the tool to control the position of the avatar. In the case of a cursor, we also define its radius as well as the size of the workspace in the virtual world.

using namespace chai3d;
// create a tool (cursor) and insert into the world
tool = new cToolCursor(world);
world->addChild(tool);
// connect the haptic device to the virtual tool
tool->setHapticDevice(hapticDevice);
// define a radius for the virtual tool (sphere)
tool->setRadius(0.03);
// map the physical workspace of the haptic device to a larger virtual workspace.
tool->setWorkspaceRadius(1.0);
// start the haptic tool
tool->start();

If you prefer to keep a one to one scale factor between the haptic device and the virtual workspace, then you may call the following method:

For each object in the scene, you can assign physical haptic properties such as, for instance, stiffness or friction. So that your application operates in a stable way on all haptic devices, you can assign haptic properties that are scaled according to the specifications and limits of your haptic device:

using namespace chai3d;
// read the scale factor between the physical workspace of the haptic
// device and the virtual workspace defined for the tool
double workspaceScaleFactor = tool->getWorkspaceScaleFactor();
// retrieve information about the current haptic device
cHapticDeviceInfo hapticDeviceInfo = hapticDevice->getSpecifications();
// get properties of haptic device
double maxLinearForce = cMin(hapticDeviceInfo.m_maxLinearForce, 7.0);
double maxStiffness = hapticDeviceInfo.m_maxLinearStiffness / workspaceScaleFactor;
double maxDamping = hapticDeviceInfo.m_maxLinearDamping / workspaceScaleFactor;

Next, we create a spherical shape primitive that is inserted and positioned inside the world:

using namespace chai3d;
// create a sphere and define its radius
object0 = new cShapeSphere(0.3);
// add object to world
world->addChild(object0);
// set the position of the object at the center of the world
object0->setLocalPos(0.0, -0.5, 0.0);

Material and texture properties are assigned to the object:

using namespace chai3d;
// create texture map
object0->m_texture = cTexture2d::create();
// load texture map from file
object0->m_texture->loadFromFile("resources/images/spheremap-3.jpg");
// set graphic properties
object0->m_texture->setSphericalMappingEnabled(true);
object0->setUseTexture(true);
object0->m_material->setWhite();

Haptic properties are assigned through the material class:

// set haptic properties
object0->m_material->setStiffness(0.4 * maxStiffness); // % of maximum linear stiffness
object0->m_material->setMagnetMaxForce(0.6 * maxLinearForce); // % of maximum linear force
object0->m_material->setMagnetMaxDistance(0.15);
object0->m_material->setViscosity(0.1 * maxDamping); // % of maximum linear damping

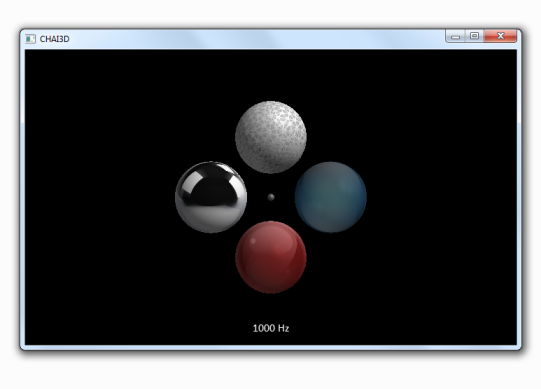
Once the haptic values are defined in the material class, we still need to enable the effects that will use these values. In this example, we enable three haptic effects that occur when the tool touches the sphere. If the effects are not initialized, then the haptic values assigned to the material class are simply ignored.

// create a haptic surface effect
object0->createEffectSurface();
// create a haptic magnetic effect
object0->createEffectMagnetic();
// create a haptic viscous effect
object0->createEffectViscosity();

To display any 2D information in a scene, we use widgets. In this example, we first define a font and create a label that display the rate at which the simulation is running. The label is placed on the front layer of the camera and will be displayed in overlay to the world.

using namespace chai3d;
// create a font
// create a label to display the haptic rate of the simulation
labelHapticRate = new cLabel(font);
camera->m_frontLayer->addChild(labelHapticRate);

Now that the scene is built we can start a haptics thread (> 1000 Hz) which runs independently from the much slower graphics thread (20-50 Hz).

using namespace chai3d;
// create a thread which starts the main haptics rendering loop
cThread* hapticsThread = new cThread();
hapticsThread->start(updateHaptics, CTHREAD_PRIORITY_HAPTICS);

Finally, here is a snapshot of the haptics loop which runs at best effort. At every iteration, the position in global coordinates is computed for every object in the world. The position of the tool is then updated by reading the sensors of the haptic device. The interaction forces between the tool and the world are computed, and the resulting force is sent back to the haptic device for display.

void updateHaptics(void)
{
// simulation in now running
simulationRunning = true;
simulationFinished = false;
// main haptic simulation loop
while(simulationRunning)
{
// compute global reference frames for each object
world->computeGlobalPositions(true);
// update position and orientation of tool
// compute interaction forces
// send forces to haptic device
tool->applyToDevice();
}
// exit haptics thread
simulationFinished = true;
}