Introduction
In CHAI3D widgets are the primary elements for displaying data and status information in 2D. Each camera contains a front and back layer on which can be attached widgets. When a camera scene is rendered, the 2D back layer is rendered first, followed by the 3D world, and finally the 2D front layer.
In the following section we review some of these basic widgets.
Widgets in CHAI3D
Panel
cPanel can be used put an empty panel on a window. Panels have properties for providing round corners, colors, and material texture properties. A panel is defined by its width and height can be placed anywhere in the viewport.
camera->m_frontLayer->addChild(panel);
Bitmap
An application can add a bitmap widget to its user interface to display an image. The image is displayed with its origin at the bottom-left corner of the widget's destination rectangle, and can be stretched along the X and Y axis.
camera->m_frontLayer->addChild(bitmap);
Background
A background widget can be used to display an image that covers the entire display window.
cBackground* background = new cBackground();
camera->m_backLayer->addChild(background);
background->setFixedAspectRatio(true);
background->loadFromFile("myImage.png");
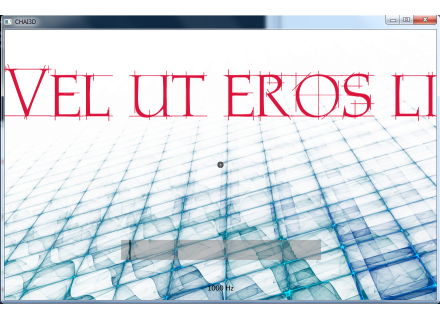
Example 05-fonts: A background image covers the entire windows.
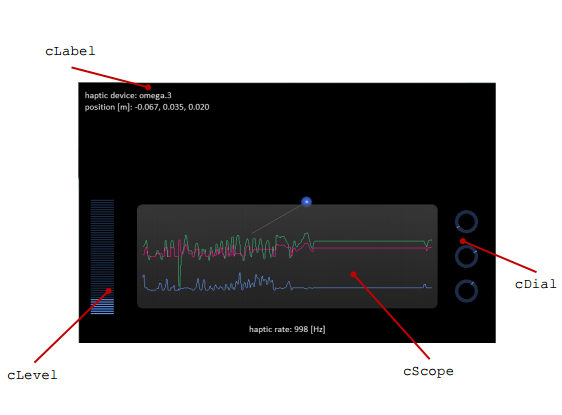
Level
A Level is a linear gauge widget which is used to let users quickly understand where a value lies in a certain range. The level can be set horizontally or vertically.
camera->m_frontLayer->addChild(level);
level->setRange(0.0, 0.1);
level->setSize(40);
level->setSingleIncrementDisplay(true);
level->setValue(value);
The Level can be set horizontally by rotating the widget of 90 degrees.
level->rotateWidgetDeg(90);
Dial
A dial offers similar capabilities than a level, but in a circular type display.

Dials: (Left) Continuous Display (Right) Single Increment Display
camera->m_frontLayer->addChild(dial);
dial->setRange(-0.1, 0.1);
dial->setSize(40);
dial->setSingleIncrementDisplay(true);
dial->setValue(value);
Scope
An application can add a cScope widget to display up to four different signals similar to a digital oscilloscope.
camera->m_frontLayer->addChild(scope);
scope->setLocalPos(100,60);
scope->setRange(-0.1, 0.1);
scope->setSignalEnabled(true, true, true, false);
scope->setTransparencyLevel(0.7);
Once the scope has been initialized, the signal values can be continuously updated with the following command:
scope->setSignalValues(value0, value1, value2, value3);
Label
A Label is a widget that is used add text in an application. For each label, a font is assigned. A font should always be created before instantiating a label and can be shared among many labels.
camera->m_frontLayer->addChild(label);
Font
CHAI3D supports the use of Bitmap fonts, which consist of a texture atlas containing all of the required letters from the font, and a text data file describing the location and size of each letter on that texture atlas.
A selection of fonts are encoded in the CHAI3D framework and can be instantiated with the following code. The full list of encoded fonts can be found in the src/resources directory.
A font can also be loaded using a font file generated by the application BMFont from AngelCode.
Creating a Bitmap Font using BMFont
Step 1
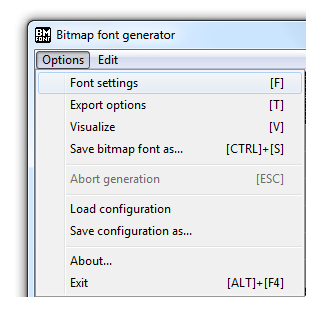
- Run BMFont and open Options->Font Settings.
Step 2
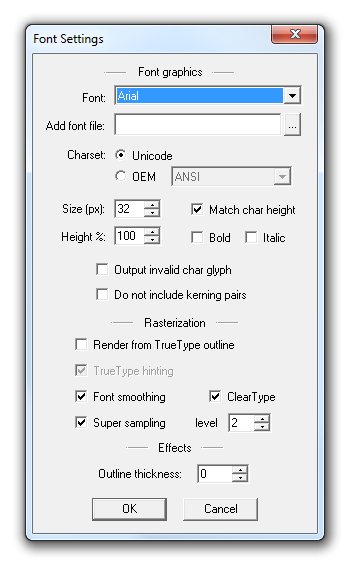
- Select your desired font from the list of installed fonts on your PC, or add a font file that you have on your harddrive.
- Set the pixel size of the font and check Match char height
- Check Font Smoothing and Super Sampling if you want the letters to be smooth and anti-aliased.
Step 3
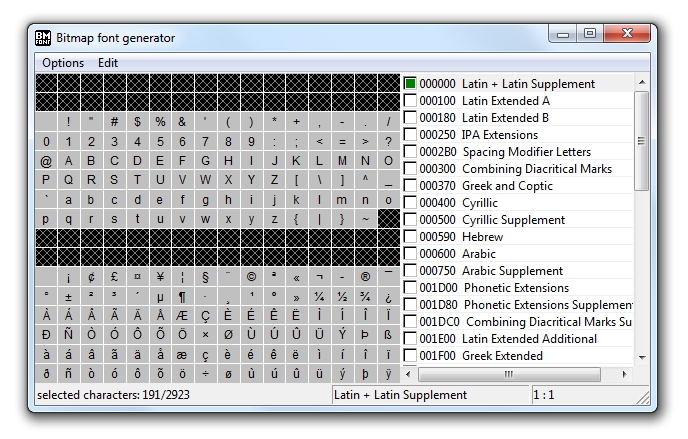
- Then back in the main tool window you'll see all the letters contained within your chosen font.
- Highlight all the letters you wish to be contained in the font, either individually by toggling on/off each letter, or by toggling subsections of letters from the list on the right.
Step 4
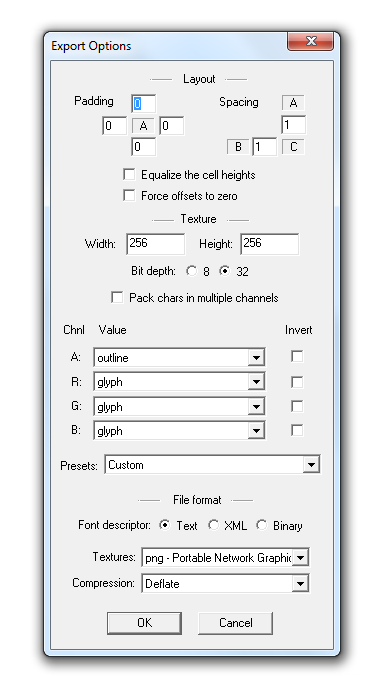
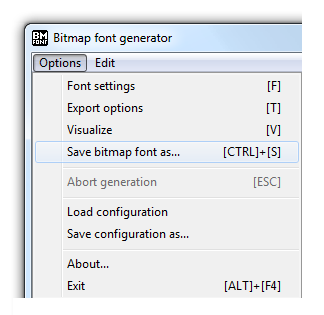
- Next, open Options->Export Options
- Depending on your chosen font, and whether you're adding any after effects to the texture atlas, you may want to add some letter padding to prevent unintentional artifacts on the letters.
- Set a Width and Height for the texture atlas. It needs to be big enough to fit all the letters onto one Texture. To check that it all fits on the chosen size, go back to the main window and press 'V' or go to Options->Visualize.
- The best is to stick to power-2 dimensions for the atlas. e.g. 2,4,8,16,32,64,128,256,512 etc.
- Check 32 Bit depth to allow alpha channel.
- Check Text File Format, and PNG for the Texture format.
Step 5
- Select Options->Save bitmap font as...
- Save the Bitmap font to your CHAI3D resource folder.