In the following section we demonstrate how to create a project from scratch using Microsoft Visual Studio. If you are using a different framework, these instructions will give you some basic information on how to get started.
The following screenshots have been taken from Microsoft Visual Studio 2013. If you are using a different version of the SDK then the menu options may change slightly, but the key functionalities should remain the same.
In the following steps we setup the basic directory structure and files necessary to build an application using CHAI3D. Depending of which display or GUI library you may want to use, project templates are provided for FreeGLUT, .NET, and Qt and can be found in the CHAI3D/templates directory.
In this example we will show you how to create a project using FreeGLUT. For the other frameworks, the setup is almost identical except for the additional libraries and/or references that may be required. In these cases, we will let you take a closer look at the project templates referenced above.
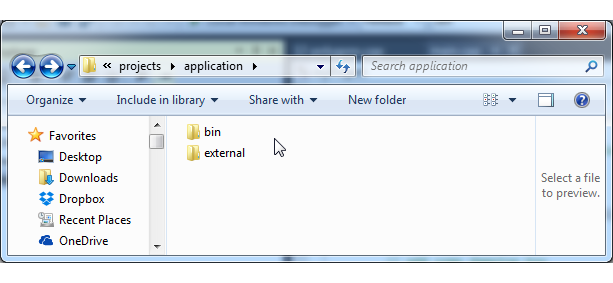
To get started, we first create an empty directory called application in which we setup all the necessary files. This directory can be created anywhere on your harddrive.
We then create two sub-directories called bin and external. The bin directory will contain the executable file of the application with any resource files associated with it (e.g. media files, DLLs, etc..). The external directory will contain all external libraries used by your application, including a copy of the CHAI3D framework.
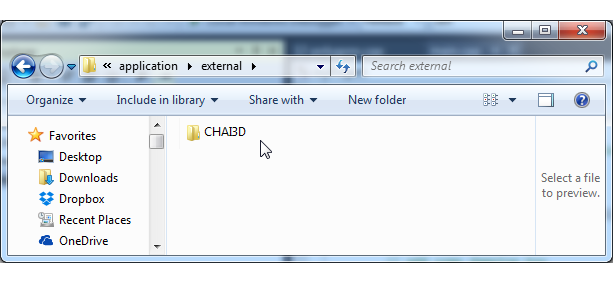
In the newly created external directory, place a copy of CHAI3D. If your application requires other frameworks or libraries, you may place a copy of these files there too.
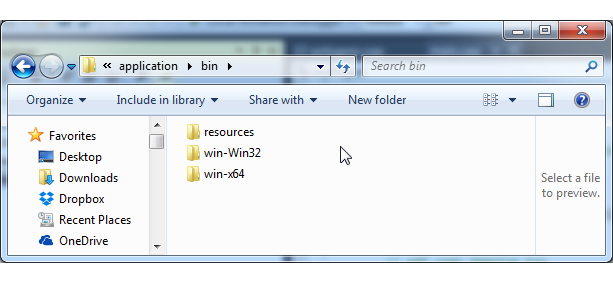
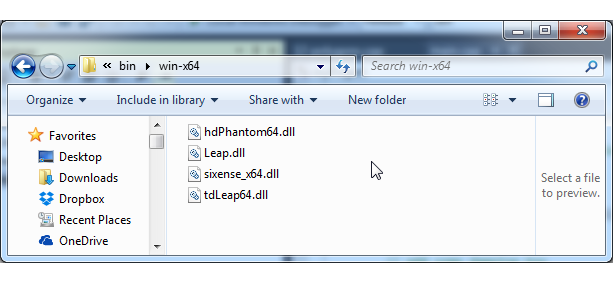
In the bin directory, please create two sub-folders named win-Win32 and win-x64 in which you will copy the following DLL files availble from the CHAI3D/bin/win-Win32 and CHAI3D/bin/win-x64 directories. These DLL files are necessary only if you plan to support different tracking or haptic devices. If you are developing an application for the Force Dimension haptic devices, none of these files are needed. If your application contains additional resource files such as images, videos, or sounds, we suggest that you store them in a sub-directory that we called resources in this example.

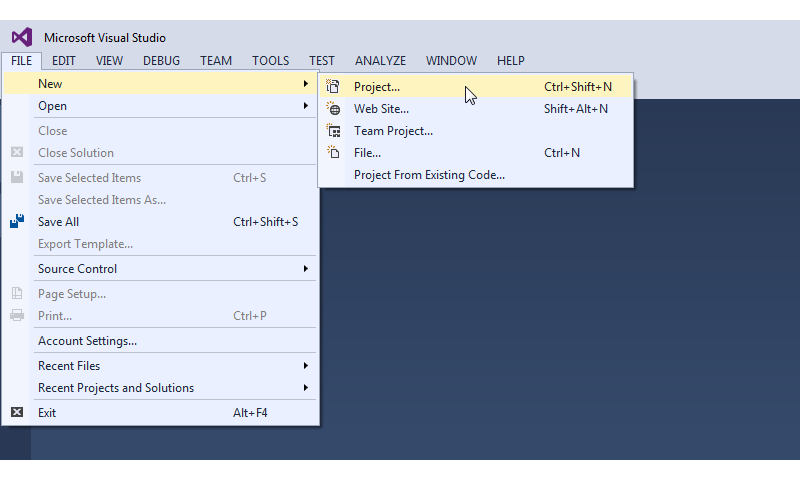
Launch Microsoft Visual Studio and create a new project file by selecting menu FILE > New > Project.
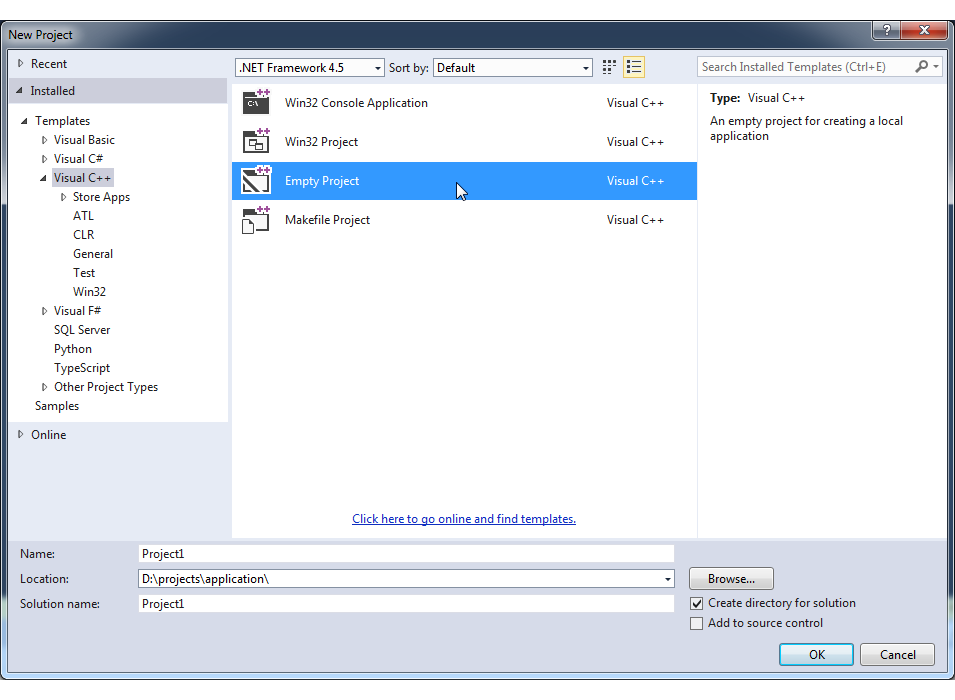
Select Empty Project and click on button Browse... to locate the newly created directory application.
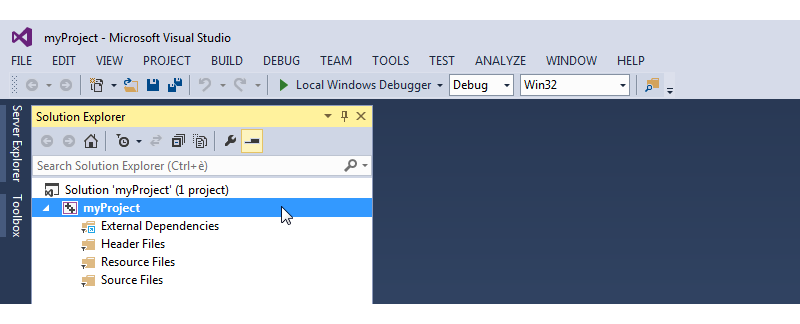
Define a name for your project. In this example we name the project: myProject.

The project and solution files are now created and can be found in directory application/myProject
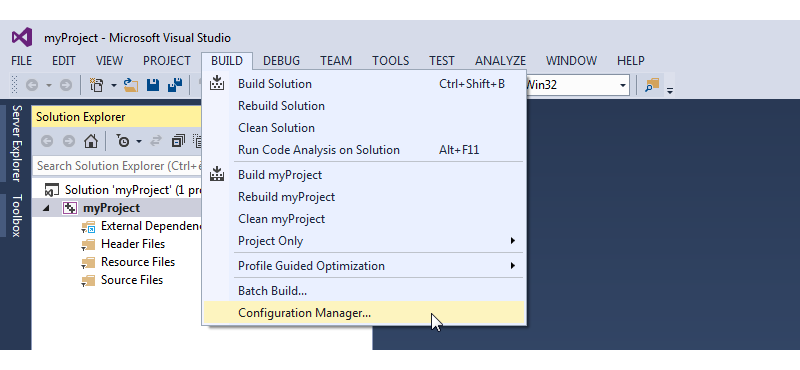
Select the configuration manager from menu BUILD > Configuration Manager....
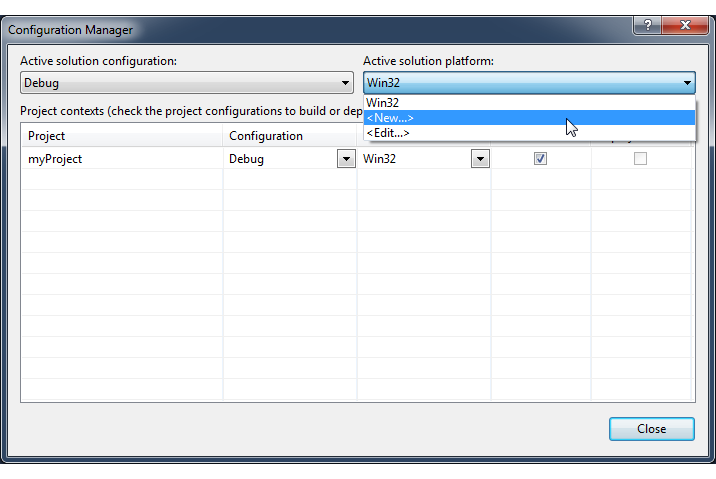
By default, settings are only created for 32-bit compilation (Win32). We now create a new configuration for 64-bit platforms (x64). It is important to perform this step before adding additional project files to your Solution.
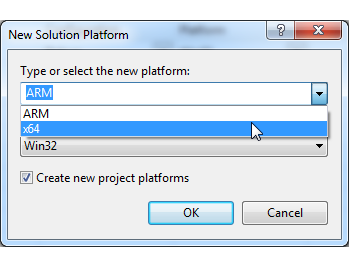
Select x64 as the new platform and click button OK
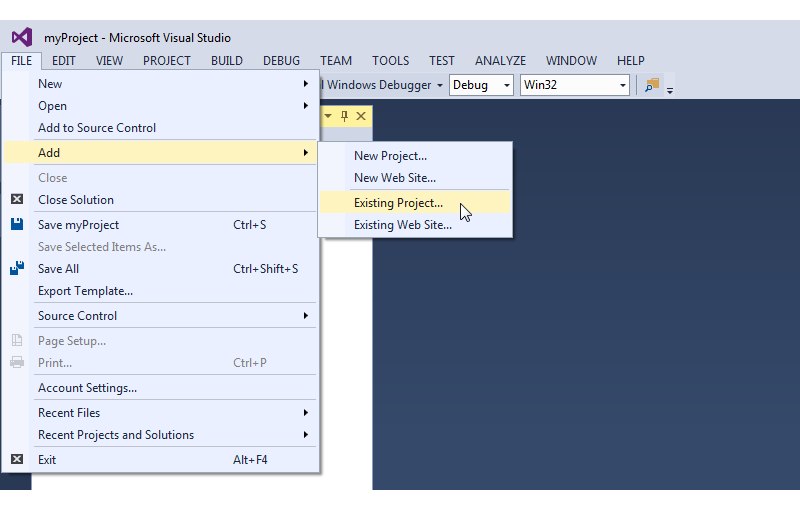
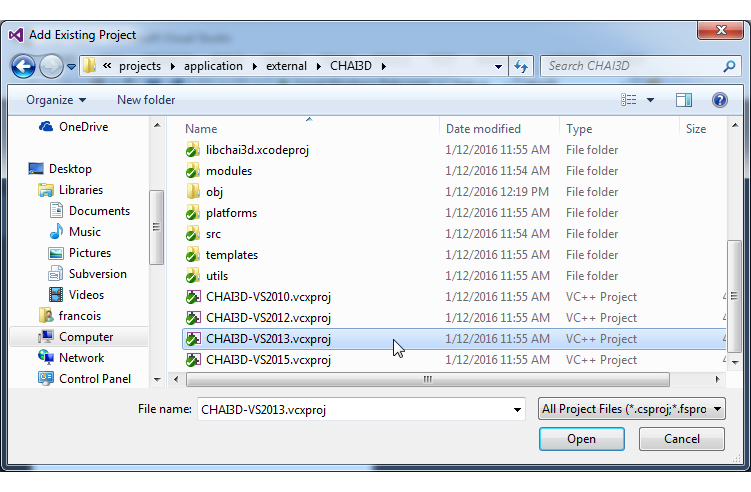
We will now add the CHAI3D project to the application. Select menu FILE > Add > Existing Project.
Select the project file corresponding to your version of Microsoft Visual Studio.
As we are using Visual Studio 2013 in our example, we select project file CHAI3D-VS2013.vcxproj
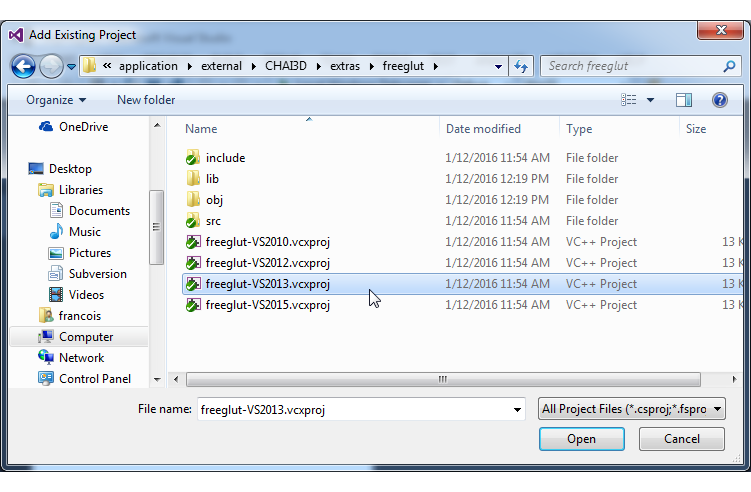
In this example we also add the FreeGLUT graphic display framework.
As performed in the previous step, select menu FILE > Add > Existing Project.
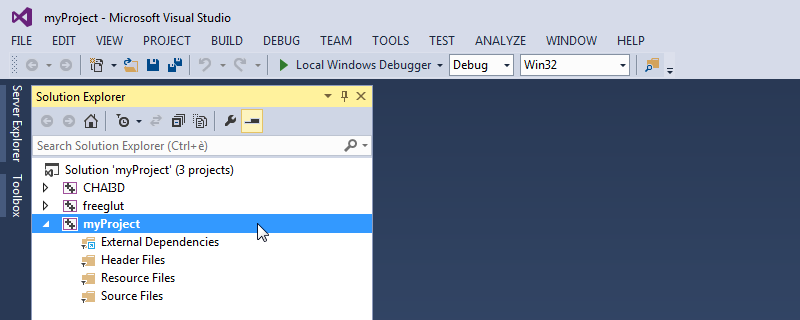
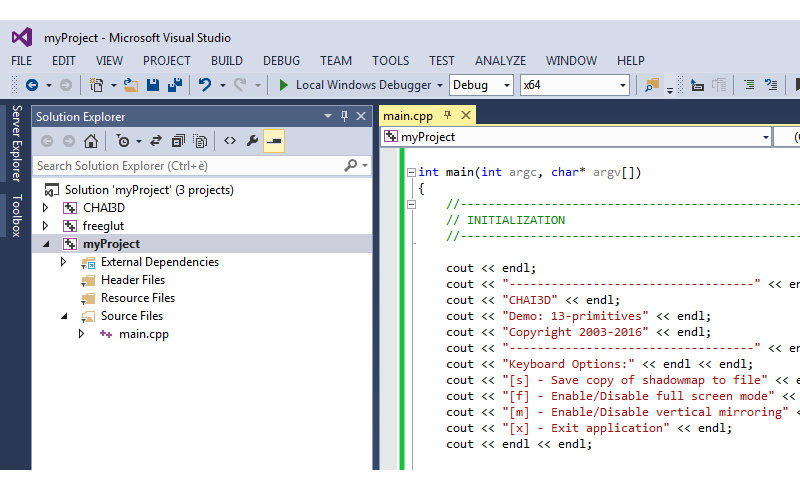
In the Solution Explorer you should now see all three projects, namely CHAI3D, freeglut, and myProject.
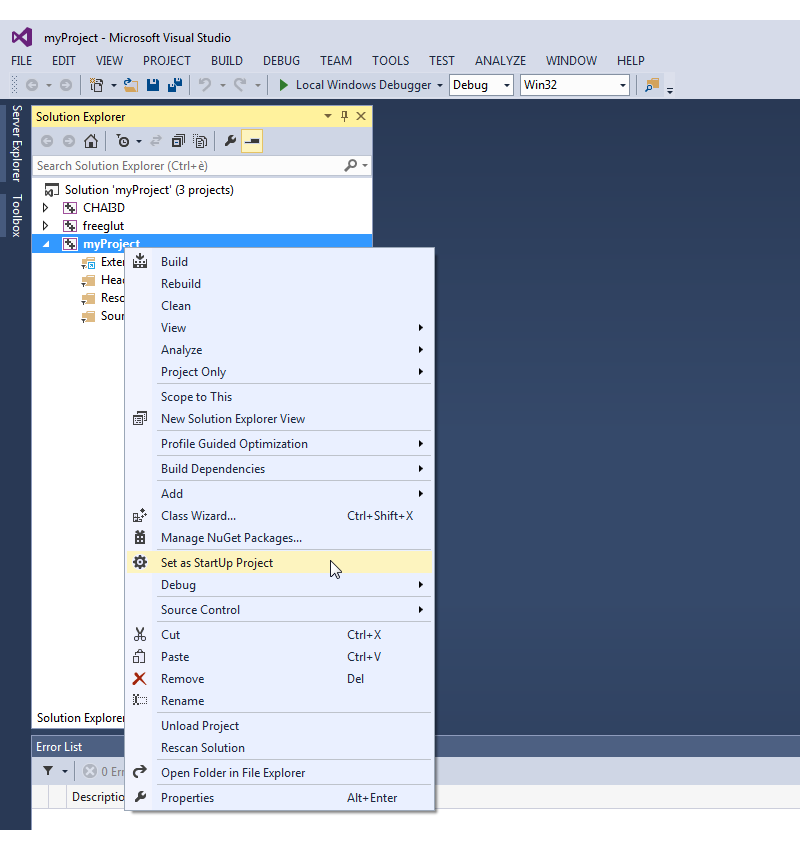
Using the mouse right button, click on myProject and select option Set as StartUp Project.
This will tell Visual Studio which application to run once the Solution has been compiled.
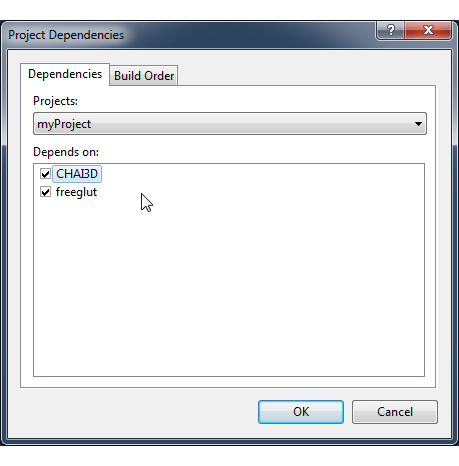
We now define the project dependencies of our project. In this example, the application requires both CHAI3D and freeglut. Select menu PROJECT > Project Dependencies.
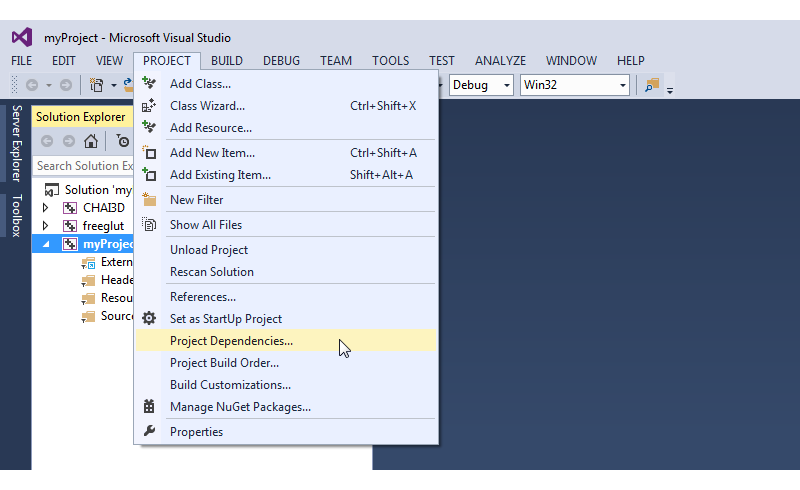
Using the mouse, check both CHAI3D and freeglut.
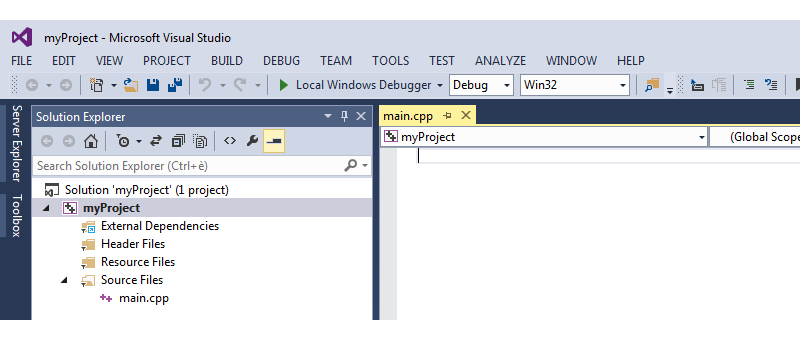
Since the project is still empty, we create an empty main.cpp file in which we will write our program.
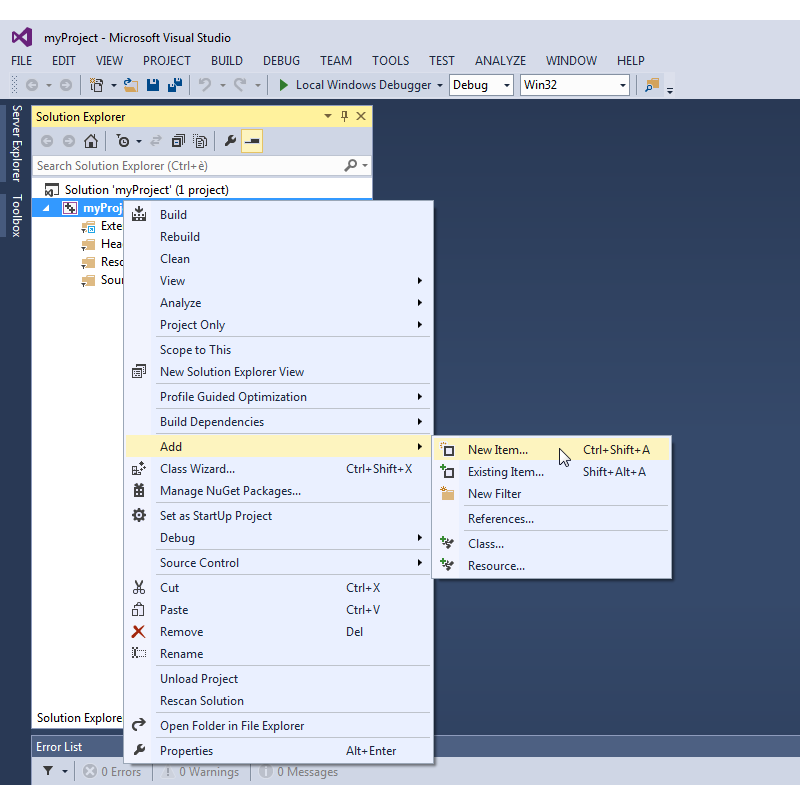
Select C++ File (.cpp) and give it the name main.cpp. Click button Add to generate the new file.
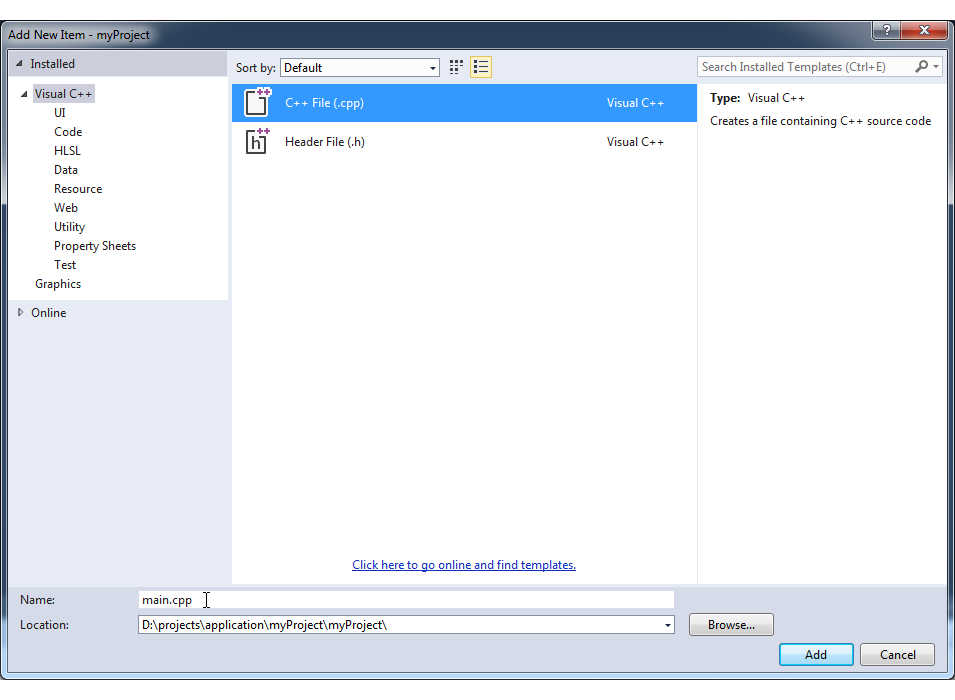
The new empty file has now been created and is ready to receive your source code.
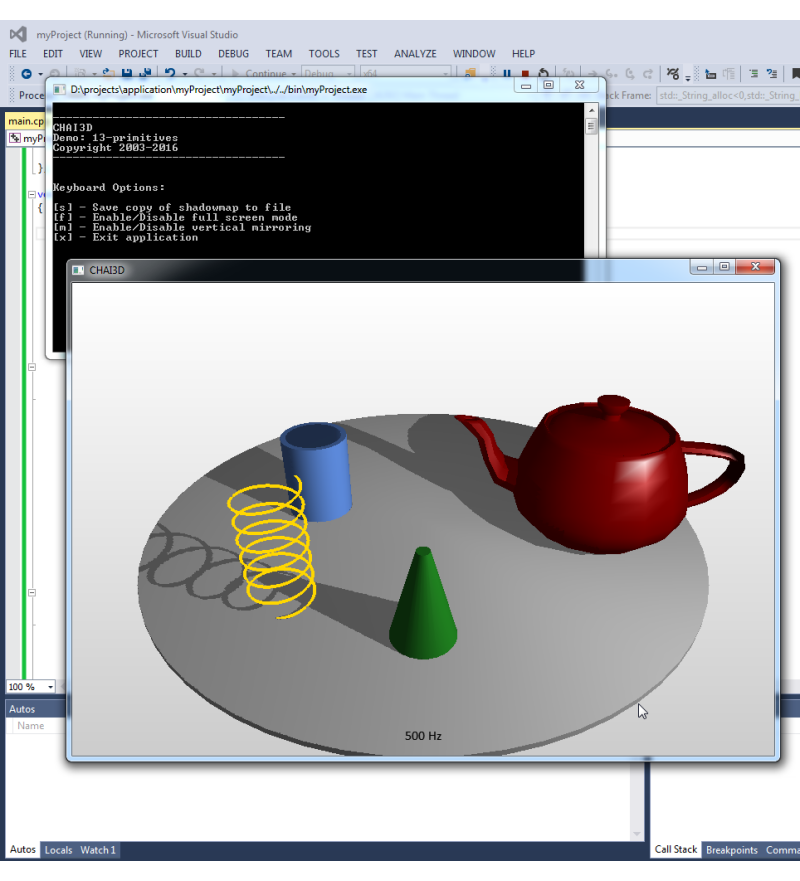
Since you will probably want to compile and run this application, we suggest that you copy the content of one of the examples provided with CHAI3D. For this demonstration we copied the code found in example CHAI3D/examples/GLUT/13-primitives. If you wish to use another example instead, make sure to also copy any necessary resource files into the application/bin directory.
In this section we setup the different project properties of our application.
Using the mouse right button, click on myProject and select option Properties.
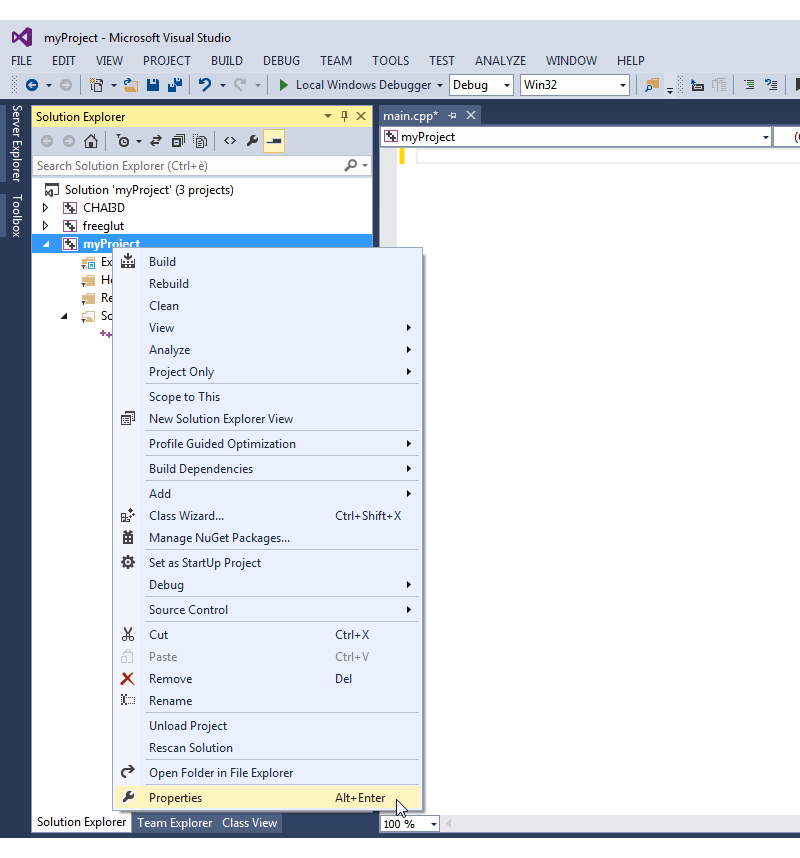
The following Property Pages Window will show up.
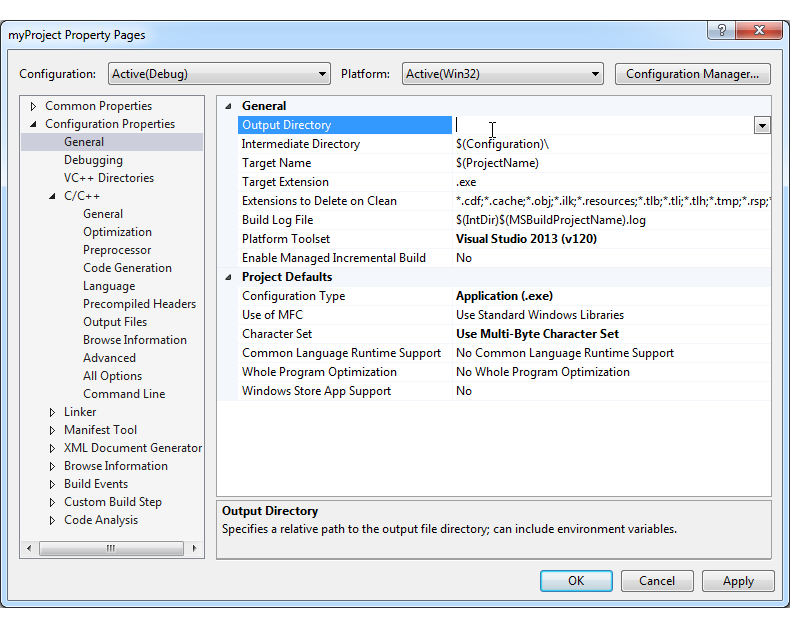
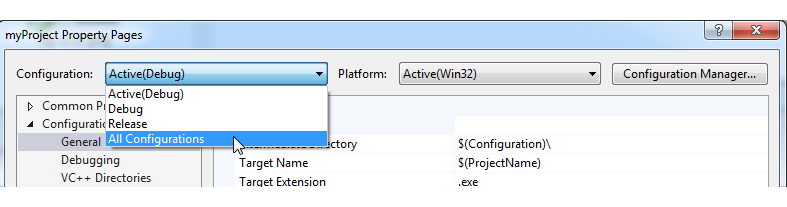
Before modifying any of the properties, we assign the Configuration to All Configurations and the Platform to All Platforms. This will allow us to assign properties to all of the four possible modes simultaneously, respectively:

In Configuration Properties / General, define the Output Directory to ../../bin/win-$(platform)\

In Configuration Properties / C/C++ / General, edit the Additional Include Directories
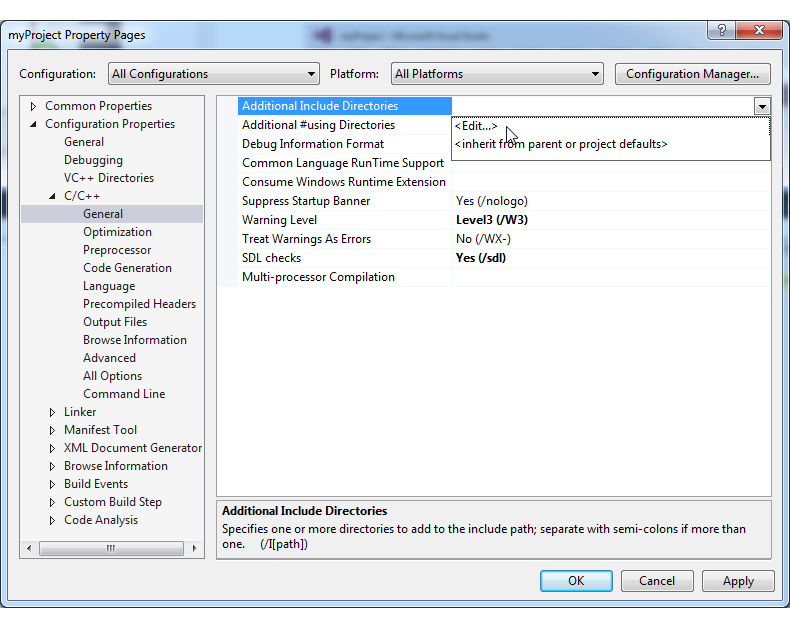
Add the following directories:
../../external/CHAI3D/src../../external/CHAI3D/external/Eigen../../external/CHAI3D/external/glew/include../../external/CHAI3D/extras/freeglut/includePlease note that the last directory is only used if you are using FreeGLUT as the display library. If you are using another framework such as .NET or Qt, then this line can be ommited and replaced by other references.

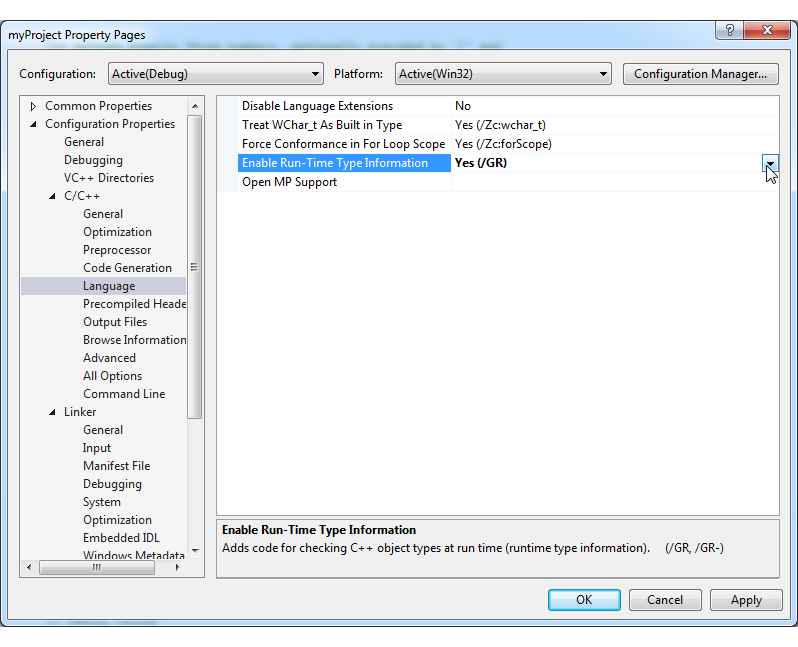
In Configuration Properties / C/C++ / Language, select Yes (/GR) for option Enable Run-Time Type Information.
In Configuration Properties / Linker / General, edit Additional Library Directories
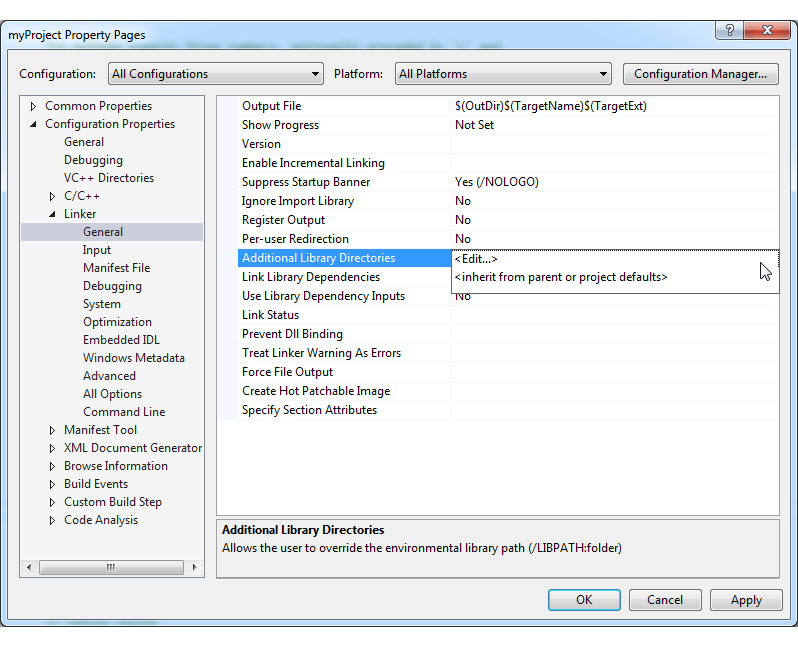
Add the following directories:
../../external/CHAI3D/lib/$(Configuration)/$(Platform)../../external/CHAI3D/extras/freeglut/lib/$(Configuration)/$(Platform)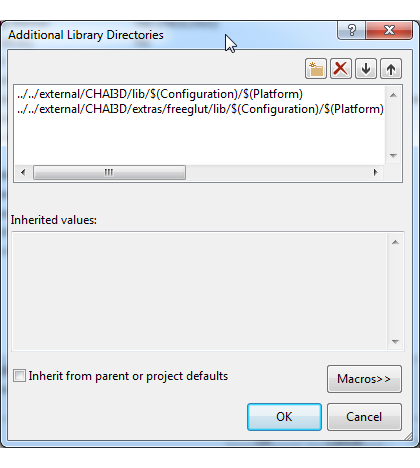
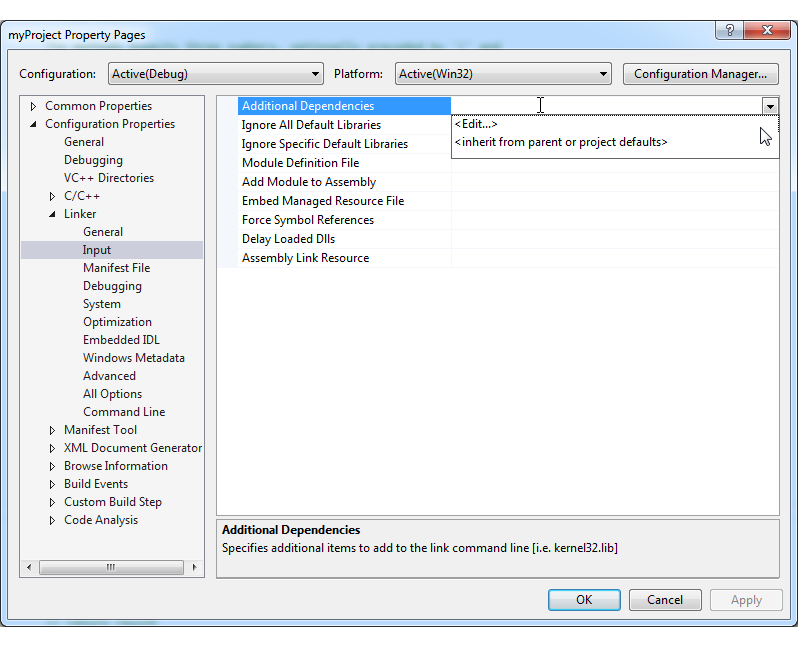
In Configuration Properties / Linker / Input, edit Additional Dependencies
Add the following library files:
chai3d.libfreeglut.lib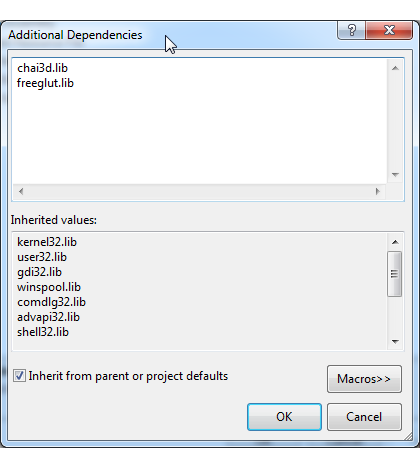
In Configuration Properties / Linker / System, select Console (/SUBSYSTEM:CONSOLE) for option SubSystem.

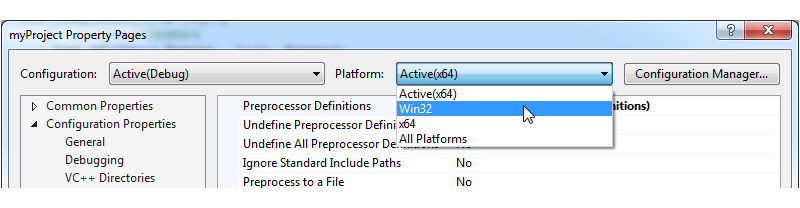
As for the final settings we now define two different preprocessor directives for the Win32 and x64 platforms.
Select the Win32 platform.
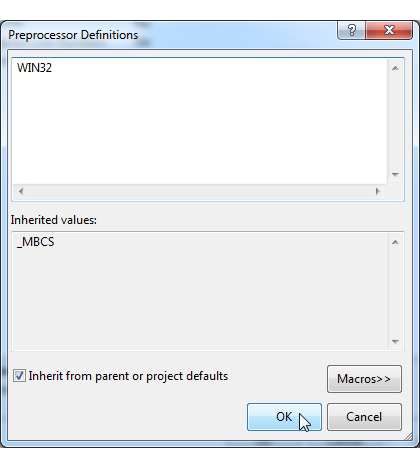
In Configuration Properties / C/C++ / Language, edit Processor Definitions.
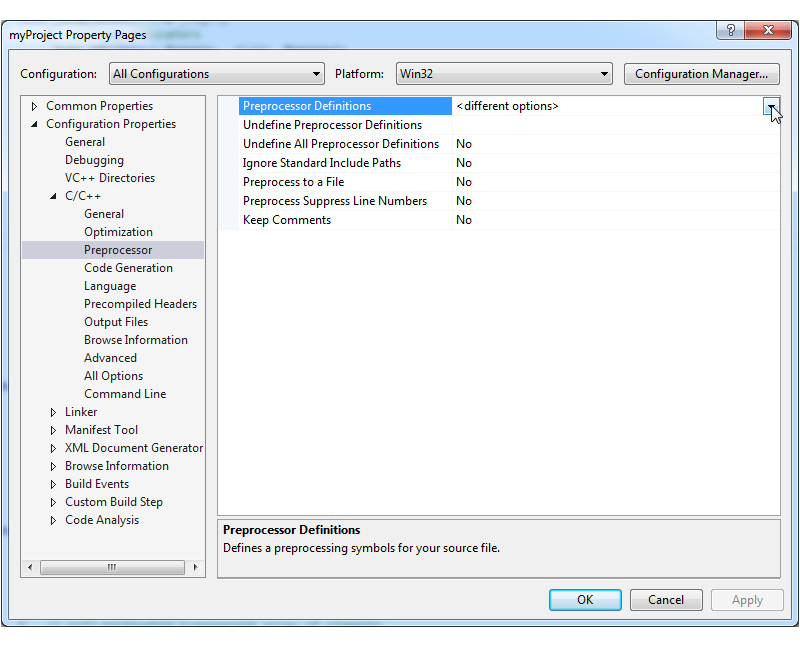
Assign the following directive: WIN32.
Select the x64 platform.
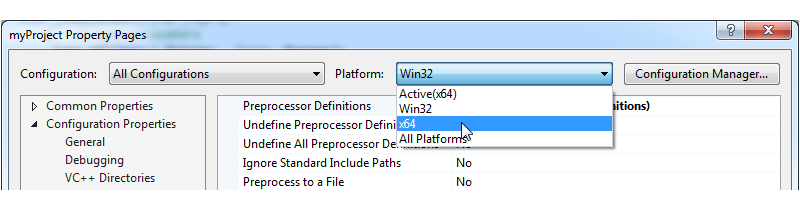
In Configuration Properties / C/C++ / Language, edit Processor Definitions.
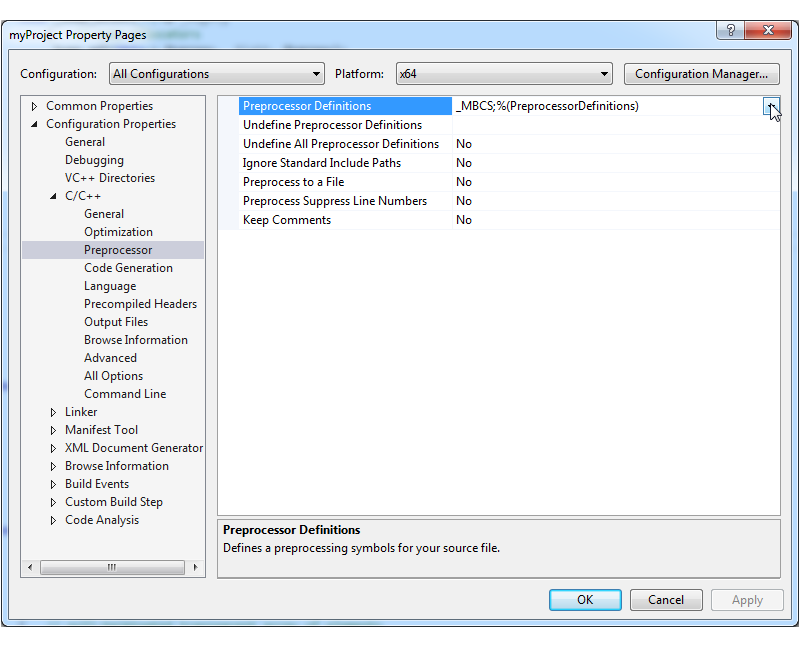
Assign the following directive: WIN64.

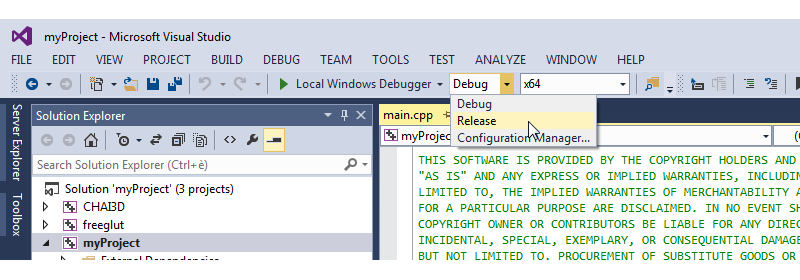
To insure maximum performance and stability of your haptic device, it is very important to always compile and run your application in Release mode whenever you are not debugging your code. If you need to debug your code, consider disabling or reducing all haptic forces to avoid having your device go unstable.
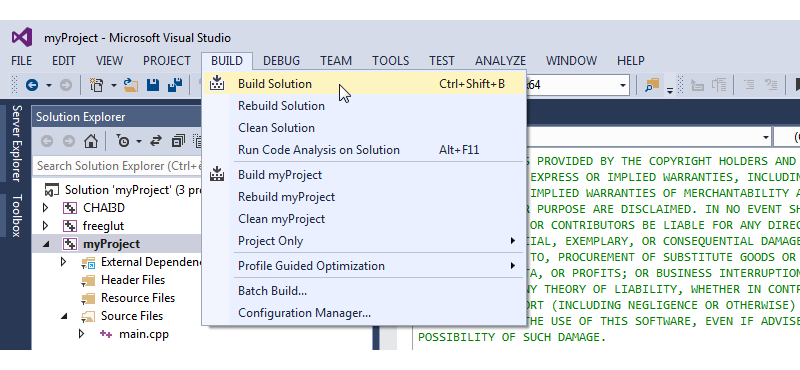
To build the entire solution, select menu BUILD > Build Solution
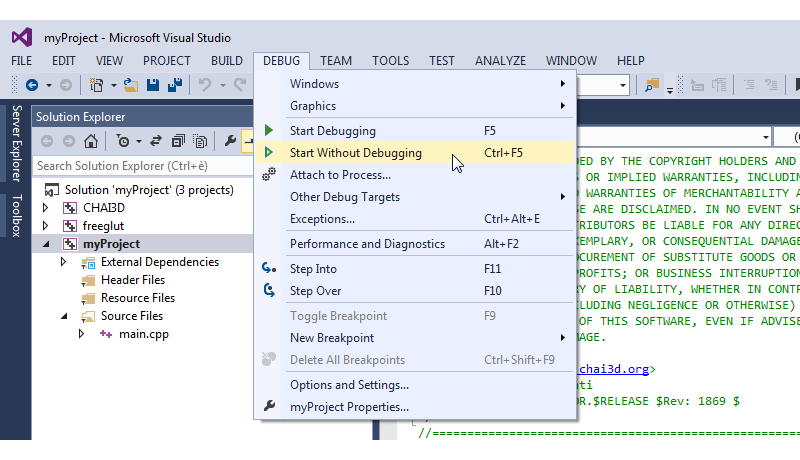
Once the application has been successfully compiled, you may run the application.
Here is a final screenshot that illustrates the application running.